Adults

Drill: Fast & Furious 3

Looking for drills to help folks stay relaxed while playing at speed? Look no further than Kristin’s Fast and Furious series! Fast and Furious 3 (FF3) helps you practice fast hands and timing precision while moving between the kawa and fuchi. (Click these links for posts on FF1, FF2, and FF4.) Here’s FF3 written out in kuchishoka and western notation, and here's a video of our friends at Taiko SOBA demonstrating the drill. Thank you SOBA for the video assist! 

Challenge yourself in FF3 by increasing tempo while staying relaxed. The tempo shifts should happen in the final four “don ka” of each full repetition (see Taiko SOBA’s demo video for an example.) If you’re using this for solo practice, pay attention to your hands, arms, body - even your face! - while you speed up. As soon as you feel yourself tensing up, stop, shake it out, and start again at a tempo where you know you can stay relaxed. Pay attention (as always) to extension, stance, and other kata basics. Many players, especially newer players, speed up by bringing their arms closer into their body or cutting other kata corners. Fight that urge!

For everyone who’s back to in-person practice, add a straight teke teke jiuchi under FF3, as SOBA does in the video. The shime player drives the speed ups. (It’s a great way to practice gradual tempo changes.) The shime player can also be the one who watches people for tension and stops the group when they see it. 

Let us know if you try FF3, and happy teaching!


Fast and Furious Drill #4

The latest in Kristin’s Fast & Furious series is a fun one! Like all drills in this series, it builds the skill of staying relaxed while playing at speed. FF4 also helps you practice precision timing and finding the pocket. Thanks to our friends Vicky and Ian from Unit Souzou, Taiko SOBA, and Jun Daiko for helping us out with this video demonstration

In the video, Ian demonstrates the drill at 120 bpm and Vicky does it at 240 bpm, and they show how to loop the drill so you’re practicing both hands equally. They’re doing it on a shime, but it translates to other types of drums and practice surfaces. The drill is written out in kuchishoka and western notation here.

Challenge yourself in FF4 by gradually increasing tempo while staying relaxed. Pay attention to your hands, arms, body - even your face! - while you speed up. As soon as you feel yourself tensing up, stop, shake it out, and start again at a tempo where you know you can stay relaxed. There are several metronome apps that will speed up for you automatically. Erin Kelly from Pittsburgh Taiko introduced me to Sound Corset, which is the one I use. Raising the hand that’s playing the “additional” beats will also increase the challenge level.

When you get back to your group practices or your classes, add a straight teke teke jiuchi to FF4 and use that to drive the speed up. (That's a great time for your shime player to practice gradual tempo changes.) The shime player can also be the one who watches people for tension and stops the group when they see it. Let us know if you try this drill!


Content note on the final paragraph of this post: reference to ongoing anti-AAPI violence in the US.

 Finally, we want to recognize that the escalating racism and violence directed towards Asian Americans and Pacific Islanders (AAPI) is making difficult time even harder. As practitioners of an art form rooted in the Japanese-American and Asian-American experience, it is especially important for white members of the taiko community to pause and think about last month’s shootings in Atlanta and the latest wave of anti-AAPI hate crimes in the US. For AAPI folks, thinking about these things probably hasn't been optional lately; white peers, we can't let it be optional for us. We all have a role to play in sending a strong collective message that we will not accept racism, discrimination, hate, and violence in our city, state, and country. We urge everyone in the taiko community to stand up and support Asian American communities. Click here and scroll to the bottom of the linked page for resources to help you educate yourself on speaking up, talking to children, and fighting anti-Asian racism and white supremacy. 


Activity: Fast Find!

Sometimes you need a quick activity to refocus a group, or to build a sense of fun into a new class. This simple activity for kids and playful adults works well on Zoom; I’ve never tried it in a live class (we created it for our virtual classes) but I’m pretty sure it will work there, too. It supports some skill development (focus and beat internalization) but mostly, it’s fun and active and helps students build a playful frame of mind, which is great for learning. And sometimes you just need a brain break!

Click to watch a demo of Fast Find!

Click to watch a demo of Fast Find!

This video shows us doing Fast Find! in one of our recent Kids Taiko Zooms. Start by playing 8 don in unison with the class. Rather than saying the kuchishoka, count the don (say “1 2 3 4 5 6 7 8” rather than “don don don don don don don don”). Play this count several times in a row until everyone has internalized the pulse. (I only do this once in the video because we’ve played the game before, so we only needed a quick review before jumping in.)  Next comes the game. First, say an object (a window, a door, something soft, etc.) then count everyone in. Students play the first note with you. During 2-7 YOU keep playing, saying the numbers out loud, and the students have to find and touch whatever object you’ve named. Their goal is to get back to their drums in time to play the 8th and final don with you. Since Kristin and I teach our online classes together, she plays the game with the students so they have an example to follow.

We usually play 4-5 rounds in our classes. It always gets energy up and puts a smile on people’s faces, which is no small thing in Month 11 of a global pandemic. If you have a particularly genki class, you’ll want to remind them that safety is more important than making getting back to their drums by the 8th don. 

Let me know if you try this game! I’d especially love to hear if you try it in an in-person class. Happy teaching!

RomeRandomBlogGraphics (1).png

Activity: Rolling Hills Drill

RollingHillGraphic.png

Online classes are not an ideal environment for working on kata or ensemble skills. They are, however, a good opportunity to work on musicianship fundamentals. The Rolling Hills Drill helps your students build the ability to keep tempo steady while varying their volume. It’s written out here in kuchishoka and western notation.  

To get the most out of this drill, do it with a metronome. You can use one of many free online metronomes and share your computer sound, or you can use an external metronome (a real one or an app) and set it near your microphone when you lead this drill. Seventy (70) bpm is a beginner-friendly starting tempo. Of course, go faster if you’re working with more advanced players!

You can repeat this drill as many times as you’d like. Rhythmically it’s quite simple, so students can focus on keeping their tempo steady. For more advanced students, challenge them to start the drill with their nondominant hand, and/or extend the crescendo and decrescendo evenly over the entire 8 beats. This is also a great drill for solo practice.

Let me know if you try the Rolling Hills drill and how it works for you. Happy teaching!

Activity: Using poems to teach pulse to kids (and playful adults)

We’re not all born with a strong sense of rhythm. This critical taiko fundamental can be developed at any age. This activity below helps kids age 7-11 (and young-at-heart adults) build their sense of rhythm, and it works well in person and over Zoom. It’s a little too goofy for middle and high school students. Next time, I’ll post the version I use with that age group. 

You want to do this with a poem that has a strong rhythm and opportunity for playful voicing. I first heard the Coyote Poem in the video in my Orff training and have used it ever since. Teach it through echo teaching, tapping the pulse on your body the whole time (as I do in the video). Once students have it, lead them through saying the poem silently to themselves, only voicing the whoops. This is challenging and very, very fun. If you’re teaching over Zoom, have students throw their arms up in the air when they say the “whoops” so you have visual confirmation (assuming you have them muted during class). 

In Zoom classes, your next step is to teach a movement sequence for students to follow while saying the poem. I demonstrate one in the video, but you can make up your own. Work towards students doing the movement sequence while voicing only the whoops. If you’re working with slightly older students (3rd and 4th grade), once they succeed with the movement sequence you created, put them into breakout rooms of 2-3 to create their own and share out when everyone comes back together. 

For in-person classes, rather than teaching a movement sequence, give each student a tennis ball. Put students into groups of 4; have each group sit in a circle and say the poem while passing their tennis balls on the pulse. Once they can do this, have them pass the tennis balls while saying the poem silently voicing only the whoops. Hilarity ensues, and so does learning! I’ve learned the hard way to be clear about expectations with the tennis balls before passing them out (i.e., if you don’t want kids to throw them at each other, or roll them across the floor, lay that out at the start, along with any consequences you have.) 

Teaching is hard right now, if you’re fortunate enough to have teaching work at all. I hope this activity brings you and your students some lightness and some learning. Let me know if you have questions or if you try it!

Activity: Body percussion: Hand Warmer, Taiko Player, Heart Warmer

Body percussion is a great way to help students maintain rhythm chops in your #taikozoom classes (as many of us have figured out!). This original (?) percussion style exists in folk traditions all over the world: palmas in flamenco, step in American Black culture, folks traditions in south Africa...the list goes on and on. If you want to take a deep dive into your own body percussion training, Antwan Davis is an Oakland-based body percussionist and stepper who has some fun videos on YouTube.

You can do more with body percussion than play your existing rep and drills! Kristin has created a rep of body percussion phrases of various difficulty levels for our classes. Here are 3 that are beginner-friendly and the way we’ve introduced and used them:

  1. Show the phrase name and beats written down on a piece of paper.

  2. Hold that paper up to your webcam and give students a moment to read it. (Your visual learners need this.) For example, we notate Hand Warmer as “slide snapsnap.”

  3. Demo the full phrase 1-2 times SLOWLY, saying whatever you wrote on the paper.

  4. Invite students to join you. 

When you’ve introduced more than one phrase, link them together. For example, Hand Warmer and Taiko Player both fit in the ma (rests) in Heart Warmer. For an extra challenge, add stepping on the beats. (We demo both of those in the video, follow the links in the previous sentence to see.) If you’re lucky enough to be sheltering in place with you co-teacher, you can each choose one pattern and do it several times in a row and have the students choose which of you to follow.

 As the pandemic continues, we hope you’re all doing okay. We’re grateful so many of you are attending our Taiko Zooms - it keeps us connected to our artform and artistic community. If you’re feeling isolated or missing taiko, please join us! If your schedule doesn’t allow you to attend, but you want to build and practice songs and skills, kaDon is an AMAZING resource and you should check them out.

Happy Zooming!

Activities for Virtual Classes: Teleflocking

"Teleflocking" is an adaptation of "Flocking," which I developed based on my experience with Theatrical Mime. In the original version, everyone stands in a loose clump, facing the same direction, and copies one person’s movement. The person you copy changes as the direction you’re facing changes. This exercise builds connection, expands awareness, and promotes shared leadership.

Below is the way Kristin and I have adapted Flocking to the virtual realm. These directions are based on using Zoom, and the video shows Teleflocking in a recent Saturday morning Community Taiko Tap-Along Play-Along. (Shout out to Viv, Eileen, Noriko and Chiara for volunteering to lead!)

  1. Have everyone turn on Gallery view.

  2. Ask for volunteers to lead. 4-5 is good for groups that don't all know each other, more works if people are well-acquainted. Leaders need to have their video on.

  3. Say the volunteers’ names in the order they'll be leading, and ask each of them to wave at their camera when you say their name. 

  4. Start moving. Participants copy you. After 10-15 seconds, say the name of the next leader. 

  5. Follow the next leader. After 10-15 seconds, say the name of the next leader. 

  6. Repeat #5 until all volunteers have had their turn. 

It only takes a minute or two, and it’s a great activity. The video delay in Zoom creates moments both beautiful and hilarious. Teleflocking brings about a moment of connection that’s precious in this time when we’re all isolated from one another and our groups. 

I’d love to hear about it if you try Teleflocking in one of your virtual classes. Happy teaching!

Shime Drill 1

This first drill in our shime series develops several skills that are foundational to good shime: tempo steadiness, speed, and producing a consistent sound no matter what sticking you’re using. Notation is here and video is here. (To keep the video short, I only demonstrate the right lead. The notation shows the drill in its full form, with left lead immediately following right.)

Try this drill at 90 bpm. If you can execute the drill with accurate timing and consistent sound at 90 bpm, increase to 92-95 bpm. If you’re successful there, keep gradually bumping the tempo up until you reach a speed where your timing starts to slip or your sound becomes uneven. That’s your fail speed. Once you find it, do this drill every day for 2 minutes: 1 minute at fail speed, and 1 minute at 2-5 bpm below fail speed. 

You will soon see huge improvements in your ability to produce consistent sound at faster tempo. As you start to succeed at your fail speed, increase the tempo until you find your new fail speed. It’s a perfect time to push ourselves to become the best individual players we can be, so we can contribute even more to our groups when we meet in person again. 

If you don’t have a metronome, there are free metronomes online and free apps available for both Android and iOS. You can also turn on your favorite streaming service - or radio! - and use the music as your metronome. Most streaming services have playlists that are at specific bpm. 

Happy practicing!

Fast & Furious Drill 2

Drill 2 in Kristin’s Fast & Furious series reinforces the skill of staying relaxed while playing at speed. It also helps you keep practice knowing where the 1 is without having to emphasize that beat. Like Fast & Furious 1, it’s good for group practice and the kind of individual practice that’s the only option for most of us right now.

Notation for the drill is here and the video is here. Approach this drill the same way you did F&F 1: pay attention to your hands, arms, body - and your face- as you gradually pick up your tempo. As soon as you feel yourself tensing up, stop, shake it out, and start again at a tempo where you know you can stay relaxed. In addition, pay attention to the first beat of every measure (hint: it’s always ka or kara) but don’t overemphasize it. This can be tricky for the phrases that start with ka instead of kara!

When you get back to your group practices or classes, add a straight teke teke jiuchi to this and use that to drive the speed up. At that time, the shime player can be the one who watches people for tension. Everyone should pay attention to their own sound and the overall sound of the group to make sure that first beat isn’t overemphasized.

Happy practicing!

Fast & Furious Drill 1

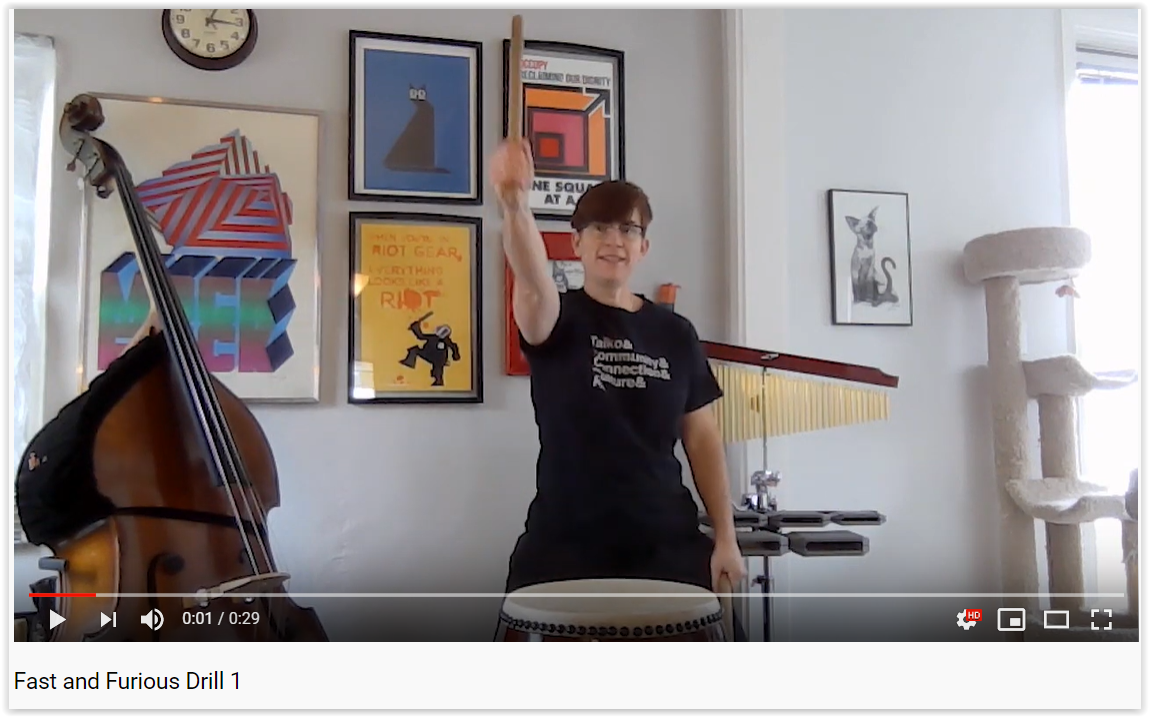
Continuing posts on how to practice taiko under quarantine/shelter-in-place, here’s the first drill in Kristin’s Fast and Furious series! It’s fantastic for individual practice, which is all that’s available to many of us right now. Notation here and video here

The point of this drill is to gradually speed up while staying relaxed. Pay attention to your hands, arms, body - even your face! - while you speed up. As soon as you feel yourself tensing up, stop, shake it out, and start again at a tempo where you know you can stay relaxed. The sticking alternates so that your opposite hand leads each time you repeat the drill, providing even practice with your dominant and non-dominant hands.

When you get back to your group practices or your classes, add a straight teke teke jiuchi to this and use that to drive the speed up. (That's a great time for the shime player to practice gradual tempo changes.) At that time, the shime player can be the one who watches for people tensing up and stops the group when they see it.

Happy practicing!

Activity: Teaching Improvisation

Improvisation can (and should!) be taught. Kristin created the activity below and I adapted it for my 4th and 5th grade residency this week. The students loved it! It’s a low-pressure way to introduce beginners to the wonderful world of making stuff up. Playing an improv by yourself is a highly exposed - and therefore high-pressure - act. This activity reduces the pressure by having everyone improv at once. Bonus: it also introduces the concept of a musical tag that indicates the beginning/end of an improvised solo.

  1. Have the students play 4 don in unison while you play a straight jiuchi. (Extension: see if they can tell you how many beats that was.)  

  2. Have the students play 4 don in unison, followed by 4 beats of improv (everyone at the same time). Keep the jiuchi going for those 8 beats.

    1. If students have trouble feeling the four, here's a way to build that skill. Alternately, you can count the 4 beats of improv out loud for them.

  3. Have them play several rounds of 4 don/4 beats improv; play a straight jiuchi the whole time.

  4. Stop to debrief. 

    1. For adults, a general “how’s it going?” will usually start a good conversation.

    2. For kids, have them talk in pairs about how it’s going, then choose several kids to share with the class.

  5. Go back to alternating 4 don/4 beats of improv for several more rounds. If students are doing extremely well, change to 8 don and 8 beats of improv.

Written out, it looks something like this:

Improv Exercise Graphic.jpg

This will go best with proper scaffolding. The school where I’m currently working can’t afford an ongoing music program, and very few students come from families that can afford private music lessons. Most kids had zero music education before I started there 3 weeks ago. I scaffolded this over two lessons using our Taiko Tiles and my method for teaching older kids to solo. Kristin and I have also done this in our adult community class and used our Taiko Tiles and Kuchishoka Deck to scaffold. Without that prior experience, this activity can be an exercise in frustration; with it, you have a fun challenge that builds student skill and confidence.

Happy teaching!

Tips for Teaching Stance: Tachi Uchi

Blog_TachiStance_2.1.2020.jpg

Stance isn’t the most exciting element of kata, but it’s the most important. A good stance is fundamental (literally) to everything else a player does, and a good tachi-uchi (aka tate-uchi) stance is fundamental to learning good naname or odaiko stance.

Here are my tips for introducing tachi-uchi stance to beginners.

  1. Explain in broad strokes.

As the teacher, you have a more nuanced understanding of how stance works. Your beginning students aren’t ready for it. Below is what I tell beginners when I teach them horse stance, which is the stance I teach for tachi-uchi. If the stance you’re teaching is different, what you say will be different. No matter what you say, keep it simple. 

  • Place your feet a bit wider than your shoulders.

  • Angle your toes out slightly. Picture standing in the middle of a clock and pointing the toes of your right foot between 1 and 2 and the toes of your left foot between 10 and 11.

    • I encourage taller students to explore a shallow split stance, placing one foot a bit behind them. If you do this, make sure that they keep their hips square to the drum, dropping a foot back without dropping that hip back.

  • Let your knees gently bend, following the angle of your toes. Knees should point slightly out, not directly forward.

  • Let your weight settle into your feet while keeping your legs engaged. Make sure you can plant the front of your foot and lift your heels up off the ground.

  • Picture an electrical current running up the inside of your leg and down the outside. This helps achieve active groundedness in your stance.

That’s it. This takes about 5 minutes, more if I spend individual time with students. (See #3.)

2. Use visual aids, but sparingly.

Totally new players who are struggling with stance will benefit from a visual reference. Provide one with masking tape (bonus: this also introduces a way spikes can mark drum placement for performances). Once a player finds their stance, put a 2-3 inch piece of tape on the floor in front of each big toe. This will help them return to the correct place each time they get into stance. Only do this for the person’s first 3-4 classes, so they don’t become overly dependent on it (textbook scaffolding). 

3. Talk less, play more.

Playing is the only way students can build a body-level understanding of any taiko fundamental. As quickly as you can, move from talking to having them play - songs, drills, games, whatever. Experience is the best teacher. Guide and correct while they’re playing, but give them lots of time to implement.

In the future I’ll share tips on how I teach stance for naname, shime, and odaiko. Happy teaching!

Taiko Games: Call and answer, but evil

Happy New Year, it’s great to be back! First some shout outs: to the inspiring and dedicated groups I worked with in November: Kokyo Taiko, Soten Taiko, Beni Daiko, Ft. Wayne Taiko and Southern Indiana Taiko; to the 200+ folks who took my workshop and the many more I met at the Percussive Arts Society International Conference; and to kaDon, who provided TimbreTaiko and uchiwa clamp setups for PASIC! These were practical and easy to use and you can read more about them here.

A few weeks ago I wrote about the power of Call and Answer to help students get used to improvising. I’ve also talked about how important it is to mix up your activities to keep students engaged. This is true for students of any age! The activity below is afantastic way to challenge students who are already successful at basic call and answer. Originally from my Orff training, I’ve adapted it for taiko.

  1. Play a 4-beat rhythm for students to echo.

  2. While they are echoing the first rhythm, play a second 4-beat rhythm. This is the next pattern the students have to echo.

  3. While students are echoing the second rhythm, play a third, and so on and so on until their heads explode.

The example below shows three full rounds and the beginning of a fourth. 

ComplexCanonGraphic.jpg

This is HARD, for students and teachers alike. In my experience, the first two rounds usually go fine; things go off the rails in Round 3. Start with just 3 rounds, and give students feedback on how they’re doing. As they improve, try more than 3 rounds. It’s really challenging to keep track of how well students are copying one rhythm while you’re playing a new rhythm, but you need to so you can give genuine feedback. (That’s what makes this challenging for teachers.) Let me know how this goes for you, and happy teaching!

Kuchishoka Tool: Taiko Tiles

Most beginners age 12 and up quickly grasp kuchishoka. Grasping is step one; building fluency comes next. Along with the kuchishoka deck, I use Taiko Tiles to support that development. (Here’s the post on my kuchishoka deck and how to use it in the classroom.)

taiko-tiles-phrases.png

Both of these instructional aids are a huge help to visual learners. The western notation supports students familiar with that system and introduces it to kids who aren’t familiar with it. Having students arrange short patterns with the Tiles and post them on the board for everyone to play is a low-risk introduction to composition. If you’re following my preferred method for teaching new songs, the Taiko Tiles can be a Step 6 (posting them to reinforce what students just learned).  

Here’s a pdf of a basic Tile set. I print them out on colored paper, putting note families on similar colors (don and doko on dark blue and light blue paper, for example) and have them laminated for durability. Masking tape works great for posting, and if you laminate them, they’ll last for several years. (Most print shops can laminate, if you don’t have access to a laminator.)

If you use this resource, let me know! I first worked with these in Tucson, and Kristin and I have fine-honed them in the last few years. I’d love to hear about any further adaptations people come up with. Happy teaching!

Building Blocks for Improvisation: Call and Answer

BlogCallAndAnswer.jpg

Improvisation is a skill that can be scaffolded and taught. (Here’s a great explanation of what scaffolding means in education, for anyone not familiar with the term.) Call and Answer exercises are an excellent way to build this skill. They also build beat vocabulary, form and strike fundamentals, and a student’s musical ear. 

Start off call and answer by playing simple 4-beat phrases and having students echo you. Start with simple phrases, without much ma or syncopation, and gradually work up to more challenging phrases. If you have a small group and/or are working with adults, do this with the drums in a circle, but keep the drums in rows for groups larger than 12 or for kids under 15. Keep this up for a few minutes; it will be engaging to students longer than it’s engaging to you. 

Next, pair students up, and have them choose someone to be A (the other person is B). Count everybody in; all As play a 4-beat phrase at the same time, and all Bs answer at the same time. Give them a “So-re” to reset and then all Bs play a phrase at the same time and all As answer at the same time. Do several rounds of this. If they get good at it, take out the “So-re” and just have them trade call and answer patterns continuously.

This gets tricky, because students really have to focus to hear the pattern their partner is playing. The advantage is that everyone is playing at the same time, so students feel quite safe in playing an improvised 4 beat pattern.

Finally, go back to large group call and answer, but this time, have students call instead of you. One student calls, everyone answers; the next student calls, everyone answers; and so on. If you have a small group and/or adults, do this in a circle. If you’re working with a group that doesn’t do well in a circle, keep them in rows and pass the call up and down the rows.

You can do these exercises in a row, or one each class, or repeat them all regularly. If you use them, let me know. Happy teaching!


Taiko Games: Whack-a-Don

Fun for students of all ages and easily adapted to different experience levels, Whack-a-Don is one of my favorite ways to energize/warm-up a group while practicing internalizing the pulse, good strike technique, and balancing group and individual attention.

I originally created this game for 8 people, but you can play with any number. It’s most successful if you play 8 or 16 don total. If you have a number other than 8 or 16, put people in teams of 2, or assign the drums more than one number.

The challenge is that each player must play their don exactly when it should happen no matter what. For example, the person at Drum #4 should their don exactly on the fourth beat even if the person at Drum #3 played late, or missed their don entirely.

The video shows the basic game and all variations. (Shout out to Taiko SOBA for appearing in the video!)

WHACK-A-DON, Basic version

  1. Arrange the drums in a row.

  2. Assign each drum a number, 1-8.

  3. Have players play 8 don in unison.

  4. Have them play 8 don again, but this time, each person only plays the number that corresponds to their drum. For example, the person at Drum #1 plays the first don, but none of the others. The person at Drum #2 plays the second don, but none of the others.

  5. Repeat steps 3 and 4 as long as you like.

VARIATION 1:

After Step 4 above, count an “Ichi-ni-so-re.” Players rotate drums during this count. The person at Drum #1 moves to Drum #2; the person at Drum #2 moves to Drum #3, etc. The person at Drum #8 moves to Drum #1. At the end of your count, repeat the 8 unison don and the 8 individual don, each person playing their new number.

VARIATION 2:

Rather than arranging the drums in a row, spread them around the room. Have players change drums during “Ichi-ni-so-re.” In this variation, players keep the same number when they move. Doing this at a brisk tempo is a fun challenge for more advanced players.

You can see it on the faces of the SOBA members at the end of the video- this game is FUN! Let me know if you try it. Happy teaching! 


Teaching Adults to Solo: Feeling the Four

fours (2).jpg

If you’ve paid much attention to popular music in the US, you’ve probably built an experiential understanding of a 4/4 time signature. You can also probably sense when a musical phrase is about to end, and you may have noticed it’s often after 16 beats, or 8, or some other multiple of 4.  

Not everyone pays this much attention to music though, and I’ve worked with taiko students who haven’t built an internal sense of what 4 beats feels like (yet). As a result, they sometimes create solos that are 9 or 17 or 33 beats long. These can be cool, but more often than not they derail the rest of the students, who are concentrating on holding a jiuchi and/or playing the tag that’s coming up. There’s a time and place for advanced  solos, but it’s not usually your beginner class. If you have a student whose complex timing is difficult for your other beginners to follow, consider moving that player to a more challenging class before they get bored and quit!

Helping students build an internal sense of 4/8/16 beats frees them to focus on movement, playing on beat, expression, and the 1,000 other things that go into soloing. Here’s how I’ve helped students build an internal sense of 16 beats. It can be easily adapted to any phrase length.

  1. Play a straight jiuchi and lead your students in counting to 16 out loud on the beat. Make sure you don’t let two syllable numbers take up two beats.

  2. Keep the jiuchi going for another 16 beats while you continue counting out loud. Have students improvise a solo (everyone at the same time, aka chaos soloing). The students don’t need to count to 16 out loud while they’re playing, but they’re welcome to.

  3. Alternate the counting for 16/playing for 16 for 10-20 rounds.

As your students get more comfortable, step down your support (i.e., only count the first 4 and last 4; stop counting entirely; don’t let the students count out loud while they’re playing). You can (and should!) also try this with a swing and horse jiuchi. Doing this for a few minutes for several classes in a row will help your students internalize what 16 beats feels like.

Let me know how this technique works for you and how you adapt it, and happy teaching!

(Lastly, a shout out to everyone I connected with at NATC in Portland! It’s so inspiring to see taiko people from all over North America come together to share our love of this art form. I was deeply touched to hear how many of you have been using activities from this blog in your classes. Thanks to everyone who attended and took the time to say hi, and I hope to see you all at NATC in 2021!)


A crossover song for beginners: Yagura no Chochin

Crossing over (a multi-drum skill) is fun for players and impressive to audiences. Kristin’s most recent composition, Yagura no Chochin, helps beginning players of all ages learn this exciting skill using a limited number of repeated phrases. The first crossovers are slow, allowing players to practice the motion. Then, the patterns get into full swing, finally incorporating movement to other drums. The song is written out here. The video shows me demonstrating the Body and our recent community class playing through the full arrangement. (Shout out to Robin, Jennifer, and Sarah!)

A few notes: 1) solo length isn’t set; the solo is over when the soloist plays the Tag; 2) the number of times you rotate in the Big Rotation depends on the number of players; rotate until everyone is back at their original drum, then play Line 4 to end the section; 3) the speed in the first section (where I’m demonstrating the Body by myself) is the correct performance tempo; 4) these rhythms are particularly ripe for mnemonics. Our last class was fond of “right ov-er, left ov-er, move ov-er, “stay right here” as a memory aid in the Big Rotation. Use what works!

If you don’t know, the yagura is the elevated platform at the center at most bon odori. People on it lead the dances, and there may be a drummer on it. It’s usually decorated with chochin (paper lanterns) as seen in this photo from the Mountain View Temple Obon. The chochin sway with the movement of the dancers. The crossing over in this song is reminiscent of that swaying, and the rotation of the players alludes to the lead dancers on the yagura.

Let us know if you learn and perform Yagura no Chochin, and happy teaching!


Teaching Beginners to Solo: Wipe Out!

You should always have more than one activity for skills you’re helping students build. A few weeks ago I wrote about teaching adults to solo using the kuchishoka deck.

Wipe Out Easy.jpg

Wipe Out! is another great activity that 1) reduces the intimidation factor around soloing 2) shows how powerful ma can be and 3) builds a feel for an 8-beat phrase. Don’t let the fact that it’s a game make you think it’s only for kids! Although I originally created it for kids, I’ve done it with kids and adults and it’s always a hit.

Here’s how Wipe Out! works. You’ll need a white board.

  1. Write the numbers 1-8 on the board.

  2. Have the students choose straight ji or swing ji and start that ji on the shime. (For true beginners, just go with straight ji.)

  3. Count the students in and have them play 8 don, one for every number on the board.

  4. Erase a number from the board.

  5. Count the students in and have them play 7 don and 1 su, placing the su on whatever number you wiped out.

    • For example; if you erased the 5, they’d play: don don don don su don don don.

  6. Repeat steps 4-5 as many times as you want.

Wipe Out Variation.jpg

As people get more comfortable, challenge them by inviting a student to come up and do the wiping out, or by eliminating the pause/count in between the wiping out and playing the revised phrase, or by letting them change a number to ka by underlining instead of wiping out, or to doko by underlining twice (seen in the photo on the left).

It’s a little silly, it’s a lot of fun, it’s challenging but not impossible, and all of that generates an learning environment where students are more willing and able to take risks (like soloing!). Have fun with it, and happy teaching!


A power song for advanced beginners: Tenryu

Looking for a power song to teach your students? Tenryu, a recent composition of ours, might fit the bill. It’s written out in kuchishoka and western notation here, and the video includes a full run and some tips from people who are learning it.

Tenryu is a great example of how much harder it can be to learn a song from transcribed kuchishoka, and I strongly recommend the video as a learning tool. A huge thank you to Taiko SOBA for being in the video! (The terms stage right and stage left are critical to connecting the notation with the video. If you’re not familiar with those terms, they’re explained here.)

Tenryu translates as “Sky Dragon” and the idea behind the song is that the entire group is a single dragon. It’s meant to convey the freedom, connection, and power generated when we channel our ki -- ALL of it-- into a collective effort.

Some notes on the song:

  • Tenryu isn’t complex rhythmically. The challenge is in playing it powerfully without tensing up.

  • Most sections start with a pick-up.

  • The patterns and tempo generate the mood of the song, rather than players hitting as hard as they can.

  • In the transcribed kuchishoka, the bold text in section C is there to make the pattern (replacing dokonko with dogodogo) easier to see.

  • Section D is challenging on two levels. It’s the only part of the piece where the chu and odaiko play different parts, and the odaiko part can be tricky to lock. There’s also an “extra” dogodogo at the end of this section. It’s unexpected for the listener, but it drives the song into the final sections.

Notes on the video:

  • The odaiko part is being played by 4 players in the back.

  • Taiko SOBA vibrated the entire room with this rendition (go SOBA!). Nevertheless, this is a great version to learn from.

As usual, we’re releasing this under Creative Commons Attribution-NonCommercial-ShareAlike  which means you’re welcome to remix, tweak, and build upon Tenryu, as long as you credit us and license any new creations under identical terms.

If you have questions while learning or teaching Tenryu, drop me a line. If you perform it, please post a video let me know. Happy teaching!