japanese

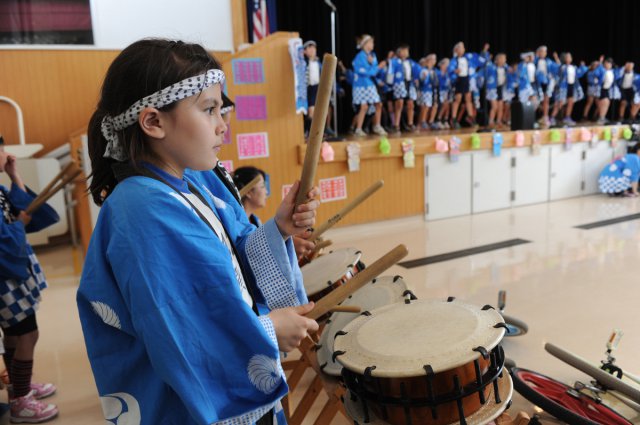
Teaching 4th and 5th graders to solo

Blog9.14.19.jpg

Just like younger students, older kids can be intimidated by the idea of soloing. Breaking it down into its component steps makes it much easier to approach.

Soloing requires awareness of and ability to play on the beat (pulse), knowledge of form and strike, and competency with basic kuchishoka. Improvising adds a level of complexity that can throw off new players, so I recommend using the method below a couple times before opening the door to improvisation. The whole thing takes about 20 minutes.

  1. Pair students up and give each team a piece of paper and pen. Have them draw a table with 2 rows and 4 columns on their paper.

  2. Give students 5 minutes to create collaborative rhythm patterns using the kuchishoka they know, writing one kuchishoka in each cell in the table.

  3. At the end of the 5 minutes, count them in and have all students say their patterns together in unison. Repeat 2-3 times, until everyone is saying their beats on the same pulse.

  4. Have them say their patterns and play them simultaneously on their laps with their hands. Repeat 2-3 times. 

  5. Have students move to the drums and play/say in unison. Repeat 2-3 times. 

  6. Add a jiuchi. Repeat 2-3 times. 

  7. Have 4 drum teams remain standing while the others sit. Have these 8 students play their patterns one drum at a time (as soon as the first one finishes, the second starts, then the third, then the fourth).

  8. Repeat Step 7 with different groups of 4 drums until every team has had a chance to play their pattern. 

At this point, each team will have a duet that can be worked into a song arrangement. If time allows, repeat the whole process but let students create true solos rather than working in teams. Alternately, you can just let them work as true soloists from the beginning if you time/equipment/space allows.

For this method to work, students need 1) to understand the jiuchi and how it supports unison playing 2) to understand basic kuchishoka and 3) to know a song structure they can plug a solo in to (Sanae Swing, Matsuri, or the alphabet/ostinato activity would all work). If they don’t have those building blocks, spend some time on them before moving to soloing.

Let me know if you have any questions about this method. Happy teaching!

(Interested in teaching other ages to solo? Here’s the post on teaching younger students; here’s one about teaching adults; and here’s a game that makes practicing this skill fun for all ages!)

Taiko Camp Part 1: Overview, and how to make a papier-maché chochin

Chochin Cover Pic.jpg

Once you’re established as a teaching artist, summer camp bookings will probably come your way. Summer camps are a great place to introduce kids to taiko! The camp format allows you to cover everything from taiko basics to taiko history (i.e., the way Internment of Japanese Americans during WWII relates to the development of taiko in the US).

I just finished a one week camp that lasted 3 hours a day for 5 consecutive days. I chose Obon as the central theme, with the campers hosting a mini-Obon on the last day. I covered 3 main activities during the camp: learning Matsuri (including solos), learning Tanko Bushi well enough to be able to teach it, and making a papier-maché chochin. We worked on each activity every day. 

Chochin are paper lanterns; at Obon, they’re often hung as decoration. The strings of chochin swaying above everyone’s heads at odori is one of my favorite sights at San Jose Obon. Here’s my step-by-step guide to making a papier maché chochin; it includes how I broke down the process so my campers did a little bit each day. 

In my next few posts, I’ll share the rest of my camp curriculum so you can take advantage of these opportunities when they arise for you. Happy teaching camping!

Teaching Beginners to Solo: Wipe Out!

You should always have more than one activity for skills you’re helping students build. A few weeks ago I wrote about teaching adults to solo using the kuchishoka deck.

Wipe Out Easy.jpg

Wipe Out! is another great activity that 1) reduces the intimidation factor around soloing 2) shows how powerful ma can be and 3) builds a feel for an 8-beat phrase. Don’t let the fact that it’s a game make you think it’s only for kids! Although I originally created it for kids, I’ve done it with kids and adults and it’s always a hit.

Here’s how Wipe Out! works. You’ll need a white board.

  1. Write the numbers 1-8 on the board.

  2. Have the students choose straight ji or swing ji and start that ji on the shime. (For true beginners, just go with straight ji.)

  3. Count the students in and have them play 8 don, one for every number on the board.

  4. Erase a number from the board.

  5. Count the students in and have them play 7 don and 1 su, placing the su on whatever number you wiped out.

    • For example; if you erased the 5, they’d play: don don don don su don don don.

  6. Repeat steps 4-5 as many times as you want.

Wipe Out Variation.jpg

As people get more comfortable, challenge them by inviting a student to come up and do the wiping out, or by eliminating the pause/count in between the wiping out and playing the revised phrase, or by letting them change a number to ka by underlining instead of wiping out, or to doko by underlining twice (seen in the photo on the left).

It’s a little silly, it’s a lot of fun, it’s challenging but not impossible, and all of that generates an learning environment where students are more willing and able to take risks (like soloing!). Have fun with it, and happy teaching!