Japanese

Teaching 4th and 5th graders to solo

Blog9.14.19.jpg

Just like younger students, older kids can be intimidated by the idea of soloing. Breaking it down into its component steps makes it much easier to approach.

Soloing requires awareness of and ability to play on the beat (pulse), knowledge of form and strike, and competency with basic kuchishoka. Improvising adds a level of complexity that can throw off new players, so I recommend using the method below a couple times before opening the door to improvisation. The whole thing takes about 20 minutes.

  1. Pair students up and give each team a piece of paper and pen. Have them draw a table with 2 rows and 4 columns on their paper.

  2. Give students 5 minutes to create collaborative rhythm patterns using the kuchishoka they know, writing one kuchishoka in each cell in the table.

  3. At the end of the 5 minutes, count them in and have all students say their patterns together in unison. Repeat 2-3 times, until everyone is saying their beats on the same pulse.

  4. Have them say their patterns and play them simultaneously on their laps with their hands. Repeat 2-3 times. 

  5. Have students move to the drums and play/say in unison. Repeat 2-3 times. 

  6. Add a jiuchi. Repeat 2-3 times. 

  7. Have 4 drum teams remain standing while the others sit. Have these 8 students play their patterns one drum at a time (as soon as the first one finishes, the second starts, then the third, then the fourth).

  8. Repeat Step 7 with different groups of 4 drums until every team has had a chance to play their pattern. 

At this point, each team will have a duet that can be worked into a song arrangement. If time allows, repeat the whole process but let students create true solos rather than working in teams. Alternately, you can just let them work as true soloists from the beginning if you time/equipment/space allows.

For this method to work, students need 1) to understand the jiuchi and how it supports unison playing 2) to understand basic kuchishoka and 3) to know a song structure they can plug a solo in to (Sanae Swing, Matsuri, or the alphabet/ostinato activity would all work). If they don’t have those building blocks, spend some time on them before moving to soloing.

Let me know if you have any questions about this method. Happy teaching!

(Interested in teaching other ages to solo? Here’s the post on teaching younger students; here’s one about teaching adults; and here’s a game that makes practicing this skill fun for all ages!)

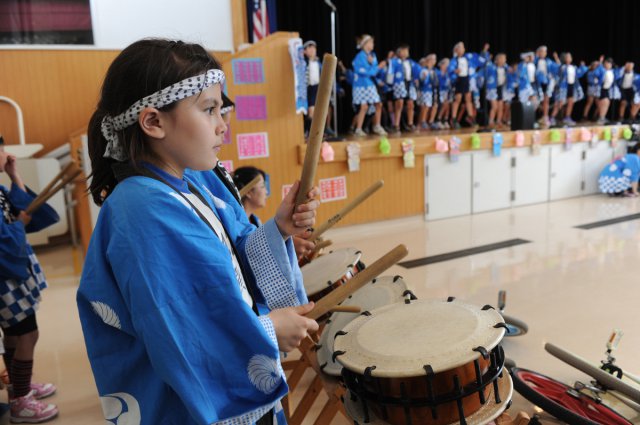
Taiko Camp Part 3: Tanko Bushi & Putting it all together

2019CampTeaching_1.jpg

Having a unifying concept makes an educational program cohesive. For my taiko camp, I chose Obon as the unifying concept because of the time of year (summer camp, summer festival), the ties between obon and taiko, and the cultural significance of the holiday both in Japan and in Japanese American communities in the US. 

That unifying concept pulled together learning taiko, making a papier-maché chochin, learning Tanko Bushi, and holding a mini-Obon on the final day. If you don’t know Tanko Bushi, a Google search will yield thousands of videos from which you can learn it. You should know the context of the song/dance before teaching it, and the Wikipedia entry on Tanko Bushi is pretty comprehensive. The best part about this dance is that it’s simple, so kids can easily build enough mastery to teach the dance at their mini-Obon, giving them a strong sense of accomplishment and pride. 

My Taiko Camp: Full Curriculum lays out exactly how I fit the Chochin, Matsuri, and Tanko Bushi activities together day-by-day. It’s a step-by-step guide to leading your first taiko camp. If you use it, I’d love to hear about it. Happy teaching camping!

Teaching K-3 students to solo

Creating patterns

Creating patterns

Soloing can intimidating. It’s a tough skill that draws on multiple competencies; acute awareness of the pulse, a large “beat vocabulary,” confidence, and more.

Soloing can be taught, but students get overwhelmed if you try to do it all at once. My method of introducing soloing to younger students breaks the skill into bite-sized pieces learned over several weeks. It’s one thing I do in class over those 4 weeks, rather than the only thing we work on. With students this age I let them create and play duets if they want, which is less high stakes and cultivates confidence.

Here’s my method:

Week 1

  1. Teach kuchishoka using the Squirrel Village story.

Fill the boxes with one kuchishoka each.

Fill the boxes with one kuchishoka each.

Week 2

  1. Remind students of the squirrel rhythm pattern from the story. Have them play it on their laps. Point out that the number of syllables they’re saying corresponds to what they’re playing.

  2. Draw a horizontal rectangle on the board. Divide it into 4 equal boxes.

  3. Choose 4 kids. Have each say don or doko. Write the words they say on the board, one per box.

  4. Lead the class through clapping the pattern their classmates created.

  5. Have students move to drums.

  6. Lead students in playing the pattern on the drums.

  7. Repeat steps 3, 4, and 6 two or three times.

  8. Introduce su. (It’s in the squirrel rhythm, but they won’t have realized it.)

  9. Repeat steps 3, 4, and 6 several more times, adding su into the mix.

Week 3
(Ask teachers to bring individual whiteboards, markers, and erasers to class.)

  1. Do steps 3, 4, and 6 from last week to activate their prior learning.

  2. Give 2-3 minutes for students to create a 4-beat rhythm pattern on their own whiteboard, drawing boxes and writing words inside them (the way they’ve been doing it as a class). Allow them to work in pairs with their drum partner or own their own.

  3. Have students say and clap their individual patterns all at the same time.

  4. Have students play their individual patterns on the drums all at the same time.

  5. Have students leave their whiteboards and rotate to a new drum.

  6. Repeat steps 4 and 5 at the new drum.

  7. Rotate and repeat for up to 20 minutes.

Week 4
(Ask teachers to bring whiteboards again.)

  1. Have students make up their own patterns individually or in pairs.

  2. Have students play their patterns all together.

  3. Have students play patterns one at a time. You need to conduct this. I count in the whole group, then make friendly eye contact with a student when it’s their turn to play and mark their 4-beats with my hand. The first time around is rocky, but the second time goes fine.

At the end of Week 4, each kid or pair has a short solo ready to plug into a song. Have them play it twice if you need a longer one. Be sure to email your classroom teachers before Weeks 3 and 4 to ask them to bring their individual whiteboards to class (I have yet to run into a class that doesn’t have a set).

If you try this approach, let me know! I’d love to hear how it goes. Happy teaching!


Introducing a jiuchi: K-3

A big challenge when teaching by yourself is the jiuchi. If you play it, many students will copy you rather than playing their part; if you don’t play it, then the group as a whole will have trouble staying on the same pulse.

I’ve developed two methods for introducing the jiuchi, teaching students how to pay attention to it without copying it exactly. The method varies from K-3 to 4th/5th; here’s how I do it with the little ones.

  1. Introduce a Play 4 Step 4 pattern.

  2. Gradually build in more Play 4 Step 4 patterns until they can do 4-5 in a row.

  3. Have them to do Play 4 Step 4 the whole way around (i.e., each student plays every drum and winds up back at their original drum).

  4. Introduce bachi (covered in a later post).

  5. Repeat steps 1-3 with bachi.

  6. Gradually introduce jiuchi.

Basically, I play in unison with them for several rounds of a simple pattern they’re comfortable with, and then phase in the jiuchi. When they stop, I ask them if I was playing the same thing as them the whole time. Most of them have noticed that I wasn’t (but stayed with their pattern even when I switched).

This takes place in Week 2, and I return to it in Week 4. With those two introductions, students usually have the understanding they need to listen to and be on beat with the jiuchi without copying it exactly.

Send me an email if you have questions, and happy teaching!


A Song for Beginners: Bamboo Shoots

Every beginning player needs to learn songs that reinforce the skills they’re learning. Renshu (by Seiichi Tanaka) is such a song. Renshu is canon, and an important part of North American taiko history. You should teach Renshu! (If you don’t know or know of Renshu, Google it now!)

But you shouldn’t only teach Renshu. In general, beginning players like to learn a lot of new songs. The more songs you can teach them, the more they’ll feel like they’re progressing (and the greater rep they’ll have to draw on for future performances).

Bamboo Shoots (Takenoko) targets middle and high level beginners. It’s challenging enough that your fastest learners won’t get bored but easy enough that slower learners will still succeed, especially if they have faster peers to copy. The video features my community class playing a short arrangement of Bamboo Shoots and includes the kuchishoka. The full song is written out here in kuchishoka and western notation.

The song’s pretty simple. If you use it, please post a video and let me know. I’d love to see where people go with it. Happy teaching!


Practicing Kuchishoka: Kuchishoka Cards

Kuchishoka Cards Pic.jpg

When they’re first learning, students need steady practice with kuchishoka to build fluency. The more fun that practice is, the more likely they are to fully engage with it, which results in better understanding, which makes the practice more fun, making them more likely to engage fully, which results in better understanding, which makes it more fun, making them more likely to engage...you get the idea.

My wonderful life and business partner Kristin helped me create this set of kuchishoka cards, and below are 2 games that use the cards. The cards incorporate western notation and Japanese lettering, allowing for easy and natural connections to general music classes and lessons on Japanese language and culture. There are lots of ways to use these in support of your state and national standards while also building skills for taiko.

Students love these games! They’re good for kids ages 7 and up - even adults get into them. Download and print the deck and try these out. The composition extension is a fun challenge for more advanced students. Good luck, and let me know how it goes!

Kuchishoka Karuta

I first encountered Karuta in my Japanese language classes, where teachers used it as a way of practicing hiragana and katakana. For Kuchishoka Karuta, the teacher breaks students into groups of 2-3 and gives each group one set of kuchishoka cards. Students sit on the floor and spread the full deck of cards face up on the floor in between them. The teacher plays a single note and students look for the card with that note. When they find it, they slap it. Whoever slaps it first gets to keep it.

For example, if you play don, students search for a don card. When they find one, they slap their hand down on it. The deck has multiples of each card, so it’s possible for everyone playing to wind up with a card. You can make it harder by removing duplicates, or make the game last longer by giving each group two sets of cards.

Continue until all cards have been picked up.

Composition Extension: Guide students in creating a short pattern using the cards they won during the game. Have students rotate to other groups and try playing the patterns other students created. If time allows, have the class work together to put all patterns together into a song.

Kuchishoka Go Fish

Just like regular Go Fish, the goal is to make a book (a complete set) of a type of note (i.e., all of the don, all of the doko, etc.)

Divide students into pairs and give each pair a deck of kuchishoka cards. Students deal out 2 hands of 7 cards each, with the remaining cards going face down in a pile in the middle. Students play Rock, Paper, Scissors to see who goes first.

The first student plays a note on their drum of a card they’re seeking. They must have at least one of that type of card in their hand to ask for it. For example, if Michelle has two don and wants to know if her partner Mia has any, she plays a don on her drum. If Mia has any don cards, she gives those cards to Michelle. If Mia doesn’t have any don, she says “Go fish!” and Michelle draws the top card from the pile. If she draws a “don,” she gets to go again. If she doesn’t, it becomes Mia’s turn to ask.

Once a student has collected all of the cards of one type, they put those cards together in a small pile face up in front of them.

The game continues until all cards have been collected into books.

You can play the game in groups of 3 as well; in that case, only deal out 4 cards to each student.

Links

Kuchishoka Cards (PDF)

Want to discuss how to incorporate these in your classroom or integrate lessons with your state/national standards? I can help! Email me to set up a video or in-person session.

Interested in ordering the fancy version of Kuchishoka Cards (seen in the picture with this post) for yourself or your classroom? They’re available at our South Bay Beat Institute Store.