Activities for Virtual Classes: Teleflocking

"Teleflocking" is an adaptation of "Flocking," which I developed based on my experience with Theatrical Mime. In the original version, everyone stands in a loose clump, facing the same direction, and copies one person’s movement. The person you copy changes as the direction you’re facing changes. This exercise builds connection, expands awareness, and promotes shared leadership.

Below is the way Kristin and I have adapted Flocking to the virtual realm. These directions are based on using Zoom, and the video shows Teleflocking in a recent Saturday morning Community Taiko Tap-Along Play-Along. (Shout out to Viv, Eileen, Noriko and Chiara for volunteering to lead!)

  1. Have everyone turn on Gallery view.

  2. Ask for volunteers to lead. 4-5 is good for groups that don't all know each other, more works if people are well-acquainted. Leaders need to have their video on.

  3. Say the volunteers’ names in the order they'll be leading, and ask each of them to wave at their camera when you say their name. 

  4. Start moving. Participants copy you. After 10-15 seconds, say the name of the next leader. 

  5. Follow the next leader. After 10-15 seconds, say the name of the next leader. 

  6. Repeat #5 until all volunteers have had their turn. 

It only takes a minute or two, and it’s a great activity. The video delay in Zoom creates moments both beautiful and hilarious. Teleflocking brings about a moment of connection that’s precious in this time when we’re all isolated from one another and our groups. 

I’d love to hear about it if you try Teleflocking in one of your virtual classes. Happy teaching!

Shime Drill 1

This first drill in our shime series develops several skills that are foundational to good shime: tempo steadiness, speed, and producing a consistent sound no matter what sticking you’re using. Notation is here and video is here. (To keep the video short, I only demonstrate the right lead. The notation shows the drill in its full form, with left lead immediately following right.)

Try this drill at 90 bpm. If you can execute the drill with accurate timing and consistent sound at 90 bpm, increase to 92-95 bpm. If you’re successful there, keep gradually bumping the tempo up until you reach a speed where your timing starts to slip or your sound becomes uneven. That’s your fail speed. Once you find it, do this drill every day for 2 minutes: 1 minute at fail speed, and 1 minute at 2-5 bpm below fail speed. 

You will soon see huge improvements in your ability to produce consistent sound at faster tempo. As you start to succeed at your fail speed, increase the tempo until you find your new fail speed. It’s a perfect time to push ourselves to become the best individual players we can be, so we can contribute even more to our groups when we meet in person again. 

If you don’t have a metronome, there are free metronomes online and free apps available for both Android and iOS. You can also turn on your favorite streaming service - or radio! - and use the music as your metronome. Most streaming services have playlists that are at specific bpm. 

Happy practicing!

Fast & Furious Drill 2

Drill 2 in Kristin’s Fast & Furious series reinforces the skill of staying relaxed while playing at speed. It also helps you keep practice knowing where the 1 is without having to emphasize that beat. Like Fast & Furious 1, it’s good for group practice and the kind of individual practice that’s the only option for most of us right now.

Notation for the drill is here and the video is here. Approach this drill the same way you did F&F 1: pay attention to your hands, arms, body - and your face- as you gradually pick up your tempo. As soon as you feel yourself tensing up, stop, shake it out, and start again at a tempo where you know you can stay relaxed. In addition, pay attention to the first beat of every measure (hint: it’s always ka or kara) but don’t overemphasize it. This can be tricky for the phrases that start with ka instead of kara!

When you get back to your group practices or classes, add a straight teke teke jiuchi to this and use that to drive the speed up. At that time, the shime player can be the one who watches people for tension. Everyone should pay attention to their own sound and the overall sound of the group to make sure that first beat isn’t overemphasized.

Happy practicing!

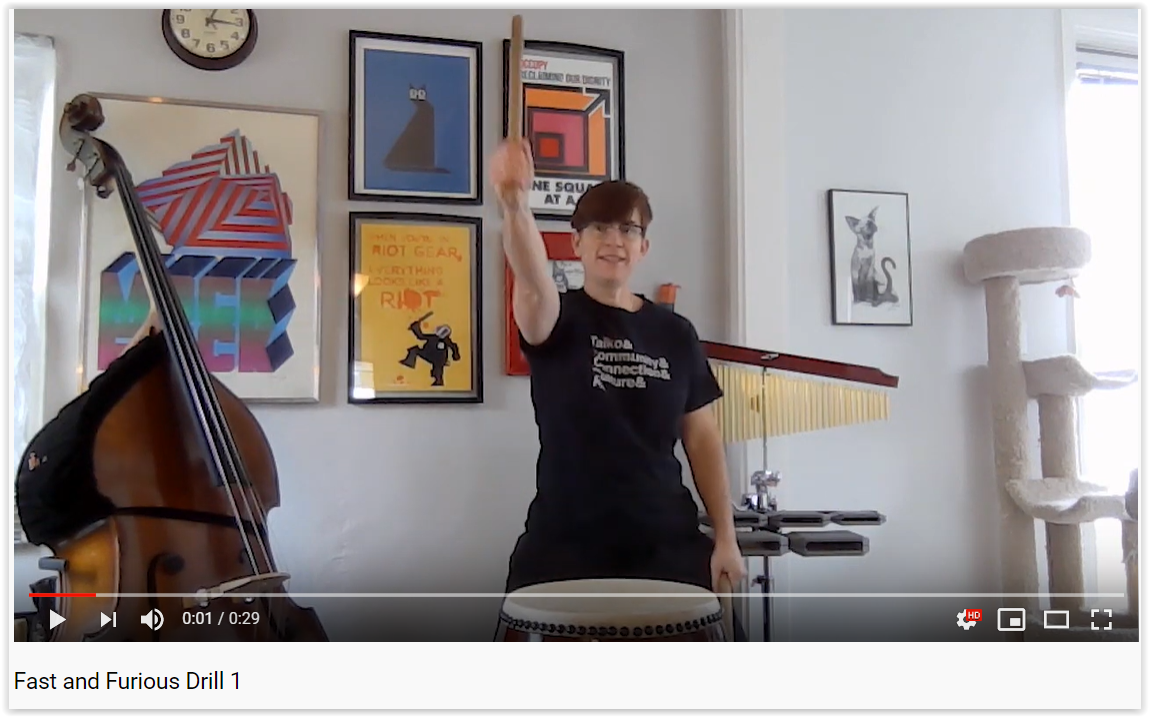
Fast & Furious Drill 1

Continuing posts on how to practice taiko under quarantine/shelter-in-place, here’s the first drill in Kristin’s Fast and Furious series! It’s fantastic for individual practice, which is all that’s available to many of us right now. Notation here and video here

The point of this drill is to gradually speed up while staying relaxed. Pay attention to your hands, arms, body - even your face! - while you speed up. As soon as you feel yourself tensing up, stop, shake it out, and start again at a tempo where you know you can stay relaxed. The sticking alternates so that your opposite hand leads each time you repeat the drill, providing even practice with your dominant and non-dominant hands.

When you get back to your group practices or your classes, add a straight teke teke jiuchi to this and use that to drive the speed up. (That's a great time for the shime player to practice gradual tempo changes.) At that time, the shime player can be the one who watches for people tensing up and stops the group when they see it.

Happy practicing!

Sharpening skills: Mental Imagery Practice

We kick off a series of posts related to playing taiko under quarantine/shelter in place with a guest post from Kristin Block, Musician/Space Scientist Extraordinaire. She also happens to be my business and life partner. Enjoy!


You're sidelined, away from your instrument, just too tired to play, or can't play because of other reasons. But you still want to practice. Now what? Enter motor imagery practice (MIP), or "mental practice!" MIP is the repeated mental simulation of an action to improve performance. In other words, drumming in your head. It's actually helpful in reinforcing and improving skills- really! (Science backs this up, see citations below.) 

mental_practice2.png

It takes a small bit of effort to make a mental practice session successful:

1) Your mental practice should be vivid, and engage as many of your senses as possible. What does that good, solid don sound like? How do the bachi feel in your hands? Can you invoke the feel of the air against your arms as strike the drum? Think of all of that (and more!) to create a realistic simulation in your head.

2) Focus on you! Your mental practice should be first-person, not from an external viewpoint. For mental practice to be effective, imagine your view of the drum and your stance, from your body.

3) Reinforce success. We've all played a wonky don or missed a ka. But you want to envision ideal strikes- the ones that hit solid, feel good, and make a great sound.

4) If possible, alternate your mental practice with physical practice. In a time of shelter-in-place, this might look like playing with bachi and good form on a makeshift practice pad during daylight hours, then mental practice at night.

5) Keep your mental practice sessions brief. Twenty minutes is a great length.

Mental practice not only helps keep your skills up, it induces neural plasticity (your brain's very amazing ability to reshape itself). There's lots of information out there on mental practice and motor imagery- for a bit more, see:

https://effectiviology.com/the-power-of-mental-practice/

Driskell, J. E., Copper, C., & Moran, A. (1994). Does mental practice enhance performance? Journal of Applied Psychology, 79(4), 481–492. https://doi.org/10.1037/0021-9010.79.4.481

Lotze, M., & Halsband, U. (2006). Motor imagery. Journal of Physiology-Paris, 99(4–6), 386–395. https://doi.org/10.1016/j.jphysparis.2006.03.012  


Happy practicing!

Activity: “I Play Taiko” Improv Game

Last time I talked about introducing older students to improvisation. I created a new game for the 4th and 5th graders I’m working with now to help them practice their budding improv skills. Most of these students had zero music education prior to my residency, and I followed the steps outlined in this post about teaching improvisation to get them ready for the activity below.

  1. Echo teach the following poem (see video for cadence):

    “I play taiko, you play taiko, we don’t take a rest/I play taiko, you play taiko, put us to the test!

    1  2 3  4 5 6  7 8” 


  2. Have students say the poem. When they get to the 8-count, one student improvises for the first 4 beats. A different student improvises for the second 4 beats.

  3. Repeat until everyone has had a chance to improvise.

As you can see in the video, I had the kids put the drums in a circle, and I kept a simple straight jiuchi the whole time. These students are true beginners so their solos are simple; they are also on beat and the correct length, which is an excellent result for total newbies (go kids!). For intermediate students, pick up the tempo and/or change to a horse ji. You can also extend the 8-count into a 16-count, doubling each improvisation to 8 beats instead of 4, and encourage students to use a wider variety of beats.

Although I did this with kids, playful adults will enjoy it too. I created an extension of this activity for advanced students, and I’ll post about that next time. Until then, happy teaching!

P.S. It was great to see so many of you at HERbeat last weekend! A huge congratulations to Jen Weir for pulling off such an incredible project, and to all of the Taiko All Stars who were in the show. It was a privilege to be in the audience!

Activity: Teaching Improvisation

Improvisation can (and should!) be taught. Kristin created the activity below and I adapted it for my 4th and 5th grade residency this week. The students loved it! It’s a low-pressure way to introduce beginners to the wonderful world of making stuff up. Playing an improv by yourself is a highly exposed - and therefore high-pressure - act. This activity reduces the pressure by having everyone improv at once. Bonus: it also introduces the concept of a musical tag that indicates the beginning/end of an improvised solo.

  1. Have the students play 4 don in unison while you play a straight jiuchi. (Extension: see if they can tell you how many beats that was.)  

  2. Have the students play 4 don in unison, followed by 4 beats of improv (everyone at the same time). Keep the jiuchi going for those 8 beats.

    1. If students have trouble feeling the four, here's a way to build that skill. Alternately, you can count the 4 beats of improv out loud for them.

  3. Have them play several rounds of 4 don/4 beats improv; play a straight jiuchi the whole time.

  4. Stop to debrief. 

    1. For adults, a general “how’s it going?” will usually start a good conversation.

    2. For kids, have them talk in pairs about how it’s going, then choose several kids to share with the class.

  5. Go back to alternating 4 don/4 beats of improv for several more rounds. If students are doing extremely well, change to 8 don and 8 beats of improv.

Written out, it looks something like this:

Improv Exercise Graphic.jpg

This will go best with proper scaffolding. The school where I’m currently working can’t afford an ongoing music program, and very few students come from families that can afford private music lessons. Most kids had zero music education before I started there 3 weeks ago. I scaffolded this over two lessons using our Taiko Tiles and my method for teaching older kids to solo. Kristin and I have also done this in our adult community class and used our Taiko Tiles and Kuchishoka Deck to scaffold. Without that prior experience, this activity can be an exercise in frustration; with it, you have a fun challenge that builds student skill and confidence.

Happy teaching!

Tips for Teaching Stance: Tachi Uchi

Blog_TachiStance_2.1.2020.jpg

Stance isn’t the most exciting element of kata, but it’s the most important. A good stance is fundamental (literally) to everything else a player does, and a good tachi-uchi (aka tate-uchi) stance is fundamental to learning good naname or odaiko stance.

Here are my tips for introducing tachi-uchi stance to beginners.

  1. Explain in broad strokes.

As the teacher, you have a more nuanced understanding of how stance works. Your beginning students aren’t ready for it. Below is what I tell beginners when I teach them horse stance, which is the stance I teach for tachi-uchi. If the stance you’re teaching is different, what you say will be different. No matter what you say, keep it simple. 

  • Place your feet a bit wider than your shoulders.

  • Angle your toes out slightly. Picture standing in the middle of a clock and pointing the toes of your right foot between 1 and 2 and the toes of your left foot between 10 and 11.

    • I encourage taller students to explore a shallow split stance, placing one foot a bit behind them. If you do this, make sure that they keep their hips square to the drum, dropping a foot back without dropping that hip back.

  • Let your knees gently bend, following the angle of your toes. Knees should point slightly out, not directly forward.

  • Let your weight settle into your feet while keeping your legs engaged. Make sure you can plant the front of your foot and lift your heels up off the ground.

  • Picture an electrical current running up the inside of your leg and down the outside. This helps achieve active groundedness in your stance.

That’s it. This takes about 5 minutes, more if I spend individual time with students. (See #3.)

2. Use visual aids, but sparingly.

Totally new players who are struggling with stance will benefit from a visual reference. Provide one with masking tape (bonus: this also introduces a way spikes can mark drum placement for performances). Once a player finds their stance, put a 2-3 inch piece of tape on the floor in front of each big toe. This will help them return to the correct place each time they get into stance. Only do this for the person’s first 3-4 classes, so they don’t become overly dependent on it (textbook scaffolding). 

3. Talk less, play more.

Playing is the only way students can build a body-level understanding of any taiko fundamental. As quickly as you can, move from talking to having them play - songs, drills, games, whatever. Experience is the best teacher. Guide and correct while they’re playing, but give them lots of time to implement.

In the future I’ll share tips on how I teach stance for naname, shime, and odaiko. Happy teaching!

Taiko Games: Call and answer, but evil

Happy New Year, it’s great to be back! First some shout outs: to the inspiring and dedicated groups I worked with in November: Kokyo Taiko, Soten Taiko, Beni Daiko, Ft. Wayne Taiko and Southern Indiana Taiko; to the 200+ folks who took my workshop and the many more I met at the Percussive Arts Society International Conference; and to kaDon, who provided TimbreTaiko and uchiwa clamp setups for PASIC! These were practical and easy to use and you can read more about them here.

A few weeks ago I wrote about the power of Call and Answer to help students get used to improvising. I’ve also talked about how important it is to mix up your activities to keep students engaged. This is true for students of any age! The activity below is afantastic way to challenge students who are already successful at basic call and answer. Originally from my Orff training, I’ve adapted it for taiko.

  1. Play a 4-beat rhythm for students to echo.

  2. While they are echoing the first rhythm, play a second 4-beat rhythm. This is the next pattern the students have to echo.

  3. While students are echoing the second rhythm, play a third, and so on and so on until their heads explode.

The example below shows three full rounds and the beginning of a fourth. 

ComplexCanonGraphic.jpg

This is HARD, for students and teachers alike. In my experience, the first two rounds usually go fine; things go off the rails in Round 3. Start with just 3 rounds, and give students feedback on how they’re doing. As they improve, try more than 3 rounds. It’s really challenging to keep track of how well students are copying one rhythm while you’re playing a new rhythm, but you need to so you can give genuine feedback. (That’s what makes this challenging for teachers.) Let me know how this goes for you, and happy teaching!

Scaffolding: the secret of artful teaching

Scaffolding.jpg

Did you learn to ride a bike with training wheels? To read “cat” before “category?” Then you have experienced scaffolding! It’s the best way to teach ANY new skill, taiko included. If your students are struggling, it’s possible you aren’t properly scaffolding your material.

“Scaffolding” is supporting students while they build skills towards more complex capacities. For example, to learn Matsuri you need basic kuchishoka fluency, the ability to play patterns on beat, a working knowledge of basic kata, and to memorize the patterns. Teaching is most effective when you teach these skills over time, gradually stepping down support as students learn.

Good scaffolding for Matsuri would include exercises that introduce and build skill in kuchishoka (my Drills 1-2 would work, as would countless other drills in the taiko world). You should also include activities that help students learn to feel the beat; the way I teach songs organically incorporates an awareness of pulse and where beats fall. Of course you can’t forget about teaching kata, and you should definitely scaffold naname-uchi by teaching tachi-uchi first. 

Scaffolding is a key factor in artful teaching. Next time you’re planning a class, take a moment to look at the basic skills required to succeed in the class and evaluate if you’ve taught those skills yet. If you haven’t, take a step back and figure out how to scaffold them. It will take you a class or two longer to get to your goal, but your students will achieve much greater mastery over the material.

Feeling stuck? I can help! I’ve been at this for nearly two decades. Drop me a line to set up a consulting session, and happy teaching!

Kuchishoka Tool: Taiko Tiles

Most beginners age 12 and up quickly grasp kuchishoka. Grasping is step one; building fluency comes next. Along with the kuchishoka deck, I use Taiko Tiles to support that development. (Here’s the post on my kuchishoka deck and how to use it in the classroom.)

taiko-tiles-phrases.png

Both of these instructional aids are a huge help to visual learners. The western notation supports students familiar with that system and introduces it to kids who aren’t familiar with it. Having students arrange short patterns with the Tiles and post them on the board for everyone to play is a low-risk introduction to composition. If you’re following my preferred method for teaching new songs, the Taiko Tiles can be a Step 6 (posting them to reinforce what students just learned).  

Here’s a pdf of a basic Tile set. I print them out on colored paper, putting note families on similar colors (don and doko on dark blue and light blue paper, for example) and have them laminated for durability. Masking tape works great for posting, and if you laminate them, they’ll last for several years. (Most print shops can laminate, if you don’t have access to a laminator.)

If you use this resource, let me know! I first worked with these in Tucson, and Kristin and I have fine-honed them in the last few years. I’d love to hear about any further adaptations people come up with. Happy teaching!

Building Blocks for Improvisation: Call and Answer

BlogCallAndAnswer.jpg

Improvisation is a skill that can be scaffolded and taught. (Here’s a great explanation of what scaffolding means in education, for anyone not familiar with the term.) Call and Answer exercises are an excellent way to build this skill. They also build beat vocabulary, form and strike fundamentals, and a student’s musical ear. 

Start off call and answer by playing simple 4-beat phrases and having students echo you. Start with simple phrases, without much ma or syncopation, and gradually work up to more challenging phrases. If you have a small group and/or are working with adults, do this with the drums in a circle, but keep the drums in rows for groups larger than 12 or for kids under 15. Keep this up for a few minutes; it will be engaging to students longer than it’s engaging to you. 

Next, pair students up, and have them choose someone to be A (the other person is B). Count everybody in; all As play a 4-beat phrase at the same time, and all Bs answer at the same time. Give them a “So-re” to reset and then all Bs play a phrase at the same time and all As answer at the same time. Do several rounds of this. If they get good at it, take out the “So-re” and just have them trade call and answer patterns continuously.

This gets tricky, because students really have to focus to hear the pattern their partner is playing. The advantage is that everyone is playing at the same time, so students feel quite safe in playing an improvised 4 beat pattern.

Finally, go back to large group call and answer, but this time, have students call instead of you. One student calls, everyone answers; the next student calls, everyone answers; and so on. If you have a small group and/or adults, do this in a circle. If you’re working with a group that doesn’t do well in a circle, keep them in rows and pass the call up and down the rows.

You can do these exercises in a row, or one each class, or repeat them all regularly. If you use them, let me know. Happy teaching!


Taiko Games: Whack-a-Don

Fun for students of all ages and easily adapted to different experience levels, Whack-a-Don is one of my favorite ways to energize/warm-up a group while practicing internalizing the pulse, good strike technique, and balancing group and individual attention.

I originally created this game for 8 people, but you can play with any number. It’s most successful if you play 8 or 16 don total. If you have a number other than 8 or 16, put people in teams of 2, or assign the drums more than one number.

The challenge is that each player must play their don exactly when it should happen no matter what. For example, the person at Drum #4 should their don exactly on the fourth beat even if the person at Drum #3 played late, or missed their don entirely.

The video shows the basic game and all variations. (Shout out to Taiko SOBA for appearing in the video!)

WHACK-A-DON, Basic version

  1. Arrange the drums in a row.

  2. Assign each drum a number, 1-8.

  3. Have players play 8 don in unison.

  4. Have them play 8 don again, but this time, each person only plays the number that corresponds to their drum. For example, the person at Drum #1 plays the first don, but none of the others. The person at Drum #2 plays the second don, but none of the others.

  5. Repeat steps 3 and 4 as long as you like.

VARIATION 1:

After Step 4 above, count an “Ichi-ni-so-re.” Players rotate drums during this count. The person at Drum #1 moves to Drum #2; the person at Drum #2 moves to Drum #3, etc. The person at Drum #8 moves to Drum #1. At the end of your count, repeat the 8 unison don and the 8 individual don, each person playing their new number.

VARIATION 2:

Rather than arranging the drums in a row, spread them around the room. Have players change drums during “Ichi-ni-so-re.” In this variation, players keep the same number when they move. Doing this at a brisk tempo is a fun challenge for more advanced players.

You can see it on the faces of the SOBA members at the end of the video- this game is FUN! Let me know if you try it. Happy teaching! 


Taiko Game: Hey hey, look at me (K-3)

Goofing around is integral to learning improvisation. A kid (or adult) who’s goofing around, making funny faces, talking in a silly voice, is learning to take risks and trust their creative instincts; with just a little bit of structure, goofing around becomes a precise educational tool.

“Hey Hey, Look at Me,” a game from my Orff training, is structured goofing around at its finest. Here’s how it works. 

1. Echo teach this song (see video for tune, or invent your own):

Hey hey, look at me

Make yourself look just like me.

2. Arrange students in 2 rows facing each other. Designate one row as #1 and the other as #2. Have row #2 turn their backs to row #1.

3. Have all students sing the song. When they finish, clap twice. At the first clap, students in row #1 strike a pose. At the second clap, students in row #2 turn around to face their partner and copy them. 

4. Repeat with row #2 striking the pose and row #1 copying. 

K-3 students LOVE this game. In the video, I’m keeping the pulse of the song with rhythm sticks, and giving the Pose/Copy cues in time with that pulse. This is slightly more advanced. Introduce the game as described above and work your way up to how I’m doing it in the video.

Bonus: once kids have learned it, this works great as an attention-getter. All you have to do is sing the first few notes and all eyes in the room will be glued to you. 

High school students and adults have fun with this game as well. The only age where it doesn’t work is pre-teen and early teen. It’s far too goofy for that age. In the future I’ll share activities that work better for those ages. Happy teaching!

Teaching 4th and 5th graders to solo

Blog9.14.19.jpg

Just like younger students, older kids can be intimidated by the idea of soloing. Breaking it down into its component steps makes it much easier to approach.

Soloing requires awareness of and ability to play on the beat (pulse), knowledge of form and strike, and competency with basic kuchishoka. Improvising adds a level of complexity that can throw off new players, so I recommend using the method below a couple times before opening the door to improvisation. The whole thing takes about 20 minutes.

  1. Pair students up and give each team a piece of paper and pen. Have them draw a table with 2 rows and 4 columns on their paper.

  2. Give students 5 minutes to create collaborative rhythm patterns using the kuchishoka they know, writing one kuchishoka in each cell in the table.

  3. At the end of the 5 minutes, count them in and have all students say their patterns together in unison. Repeat 2-3 times, until everyone is saying their beats on the same pulse.

  4. Have them say their patterns and play them simultaneously on their laps with their hands. Repeat 2-3 times. 

  5. Have students move to the drums and play/say in unison. Repeat 2-3 times. 

  6. Add a jiuchi. Repeat 2-3 times. 

  7. Have 4 drum teams remain standing while the others sit. Have these 8 students play their patterns one drum at a time (as soon as the first one finishes, the second starts, then the third, then the fourth).

  8. Repeat Step 7 with different groups of 4 drums until every team has had a chance to play their pattern. 

At this point, each team will have a duet that can be worked into a song arrangement. If time allows, repeat the whole process but let students create true solos rather than working in teams. Alternately, you can just let them work as true soloists from the beginning if you time/equipment/space allows.

For this method to work, students need 1) to understand the jiuchi and how it supports unison playing 2) to understand basic kuchishoka and 3) to know a song structure they can plug a solo in to (Sanae Swing, Matsuri, or the alphabet/ostinato activity would all work). If they don’t have those building blocks, spend some time on them before moving to soloing.

Let me know if you have any questions about this method. Happy teaching!

(Interested in teaching other ages to solo? Here’s the post on teaching younger students; here’s one about teaching adults; and here’s a game that makes practicing this skill fun for all ages!)

Another Pulse Game: Mabel Mabel

You can never have enough games! I learned this one in my Orff training and I’ve added additional scaffolding over the years. It’s an excellent way for young students to practice pulse and begin to learn about finding the pocket. It takes 20 minutes to introduce and play, and works best when introduced over 3 consecutive classes, 5-10 minutes at a time.

 This is one of those activities that’s a snap (ha ha) once you see it in action, so if it’s hard to grasp from the explanation below, check out the video. You can’t hear the students very well, but you can hear me.

 Class 1, 5 minutes

  1. Have everyone sit in a circle. Join the circle.

  2. Show students a simple “pat-pat/wave-wave” pattern and have them copy you.

  3. Go around the circle and have each student say their favorite color one at a time during the “wave-wave.” Allow the pulse to stop if a student hesitates.

  4. Go around the circle again and have each student say their favorite food. This time, keep the pulse steady even if someone hesitates or misses their turn entirely.

 Class 2, 5 minutes

  1. Sitting in a circle, pat-pat/wave-wave and say a favorite color (see video). (Step 4 from last time)

  2. Teach the following body percussion pattern: pat clap snap clap pat clap snap snap

  3. Echo teach the following rhyme: Mabel Mabel/Set the table/Don’t forget the/snap) (snap)

  4. Put rhyme and body percussion pattern together.

  5. Check in and make sure everyone knows what “set the table” means.

Class 3, 10 minutes

  1. Sitting in a circle, practice the Mabel Mabel rhyme and body percussion pattern together (step 4 from last week).

  2. Explain the game: everyone says the chant and does the body percussion. During the “snap snap” one student says something they’d put on the table. (Go around the circle in a predictable fashion so you know who’s turn it is; don’t let kids “popcorn” their answers.) Repeat the chant until every student has had a turn. This first time you go around the circle, allow the chant to stop if a student hesitates.

  3. Do it again; this second time, don’t let the chant stop. If a student hesitates, they’re out. (the full game looks like this)

 VARIATIONS: A student can also get out by repeating something another student has already said.

 With younger students, this game can be a “choose your battle” exercise for the teacher. For example, the kids will probably speed up. If your primary focus is tempo steadiness, stop the game, point out that they’ve sped up, and start again at the correct tempo. Repeat this several times. Alternately, if you’re approaching the game as an introduction to finding the pocket and soloing, then too much emphasis on keeping a steady tempo detracts from that goal. Kids over age 8 (ish) can handle both of these focuses, but it’s a little too much for kids under 8.

 Once they’ve learned it, kids ask for this game at every class. Let me know if you use it, and happy teaching!


Teaching Adults to Solo: Feeling the Four

fours (2).jpg

If you’ve paid much attention to popular music in the US, you’ve probably built an experiential understanding of a 4/4 time signature. You can also probably sense when a musical phrase is about to end, and you may have noticed it’s often after 16 beats, or 8, or some other multiple of 4.  

Not everyone pays this much attention to music though, and I’ve worked with taiko students who haven’t built an internal sense of what 4 beats feels like (yet). As a result, they sometimes create solos that are 9 or 17 or 33 beats long. These can be cool, but more often than not they derail the rest of the students, who are concentrating on holding a jiuchi and/or playing the tag that’s coming up. There’s a time and place for advanced  solos, but it’s not usually your beginner class. If you have a student whose complex timing is difficult for your other beginners to follow, consider moving that player to a more challenging class before they get bored and quit!

Helping students build an internal sense of 4/8/16 beats frees them to focus on movement, playing on beat, expression, and the 1,000 other things that go into soloing. Here’s how I’ve helped students build an internal sense of 16 beats. It can be easily adapted to any phrase length.

  1. Play a straight jiuchi and lead your students in counting to 16 out loud on the beat. Make sure you don’t let two syllable numbers take up two beats.

  2. Keep the jiuchi going for another 16 beats while you continue counting out loud. Have students improvise a solo (everyone at the same time, aka chaos soloing). The students don’t need to count to 16 out loud while they’re playing, but they’re welcome to.

  3. Alternate the counting for 16/playing for 16 for 10-20 rounds.

As your students get more comfortable, step down your support (i.e., only count the first 4 and last 4; stop counting entirely; don’t let the students count out loud while they’re playing). You can (and should!) also try this with a swing and horse jiuchi. Doing this for a few minutes for several classes in a row will help your students internalize what 16 beats feels like.

Let me know how this technique works for you and how you adapt it, and happy teaching!

(Lastly, a shout out to everyone I connected with at NATC in Portland! It’s so inspiring to see taiko people from all over North America come together to share our love of this art form. I was deeply touched to hear how many of you have been using activities from this blog in your classes. Thanks to everyone who attended and took the time to say hi, and I hope to see you all at NATC in 2021!)


Taiko Camp Part 3: Tanko Bushi & Putting it all together

2019CampTeaching_1.jpg

Having a unifying concept makes an educational program cohesive. For my taiko camp, I chose Obon as the unifying concept because of the time of year (summer camp, summer festival), the ties between obon and taiko, and the cultural significance of the holiday both in Japan and in Japanese American communities in the US. 

That unifying concept pulled together learning taiko, making a papier-maché chochin, learning Tanko Bushi, and holding a mini-Obon on the final day. If you don’t know Tanko Bushi, a Google search will yield thousands of videos from which you can learn it. You should know the context of the song/dance before teaching it, and the Wikipedia entry on Tanko Bushi is pretty comprehensive. The best part about this dance is that it’s simple, so kids can easily build enough mastery to teach the dance at their mini-Obon, giving them a strong sense of accomplishment and pride. 

My Taiko Camp: Full Curriculum lays out exactly how I fit the Chochin, Matsuri, and Tanko Bushi activities together day-by-day. It’s a step-by-step guide to leading your first taiko camp. If you use it, I’d love to hear about it. Happy teaching camping!

Taiko Camp Part 2: Teaching a Song

It wouldn’t be a taiko camp if the kids didn’t play taiko! I recommend teaching a song that combines unison playing with soloing so students get to experience both of these elements of our art form.

2019CampTeaching_1.jpg

In my most recent camp, I taught Matsuri, arranged to include short duets the kids wrote themselves. I broke the process down over the 5 days of camp as outlined here. By the last day the kids were ready to perform the song for their mini-obon.

Happy teaching camping!